Tampilkan postingan dengan label i. Tampilkan semua postingan

Sabtu, 07 Januari 2017

Bigger than I Realized


I cant describe how nice it is to be doing something other than sanding and fairing. The stringers have been removed, and were now beginning to tape the internal seams. Greg taped the front transom over the weekend, and we both taped the rear transom last night. During last nights session, my younger daughter climbed inside the hull and cruised around on her Heelys. That was when I realized just how big this boat actually is. I took a video of this, which is posted here.
Read More..

Sabtu, 01 Oktober 2016

I Almost Cried

I went to Gregs for another round of work last night. When I got there, I saw something that almost made me burst out in tears. Greg had virtually cut the boat in half.

After rolling the boat, Greg measured the width of the boat, and it was something like eight and a half feet wide, roughly six inches over the maximum width allowed without getting a permit to tow a wide load. Greg had originally decided to risk it... after all, the width would be difficult at best to measure. Apparently he changed his mind.

In order to get the width reduced, Greg put a relief cut in each side, from the top to about three inches from the bottom. He then used straps to pull the hull to the width he wanted, and then filled the relief cuts with thickened epoxy and re-taped the hull, inside and out. He cut through the spray rail and everything.

Its his boat, so he can do what he wants. But had I known what he was thinking, Id have done everything in my power to talk him out of doing that. We could have used straps and epoxy and pulled the hull in, attaching it to the frame pieces, and things would have been much less invasive. Additionally, the bottom is probably ever-so-slightly hooked now, and the spray rails will likely have a noticeable bend at the cutting point. The biggest thing though, is the fact that were going to have to re-sand and re-paint this scar, and probably re-tape it a couple more times as well.

I almost cried.
Read More..

Senin, 15 Agustus 2016

Tying the Hull


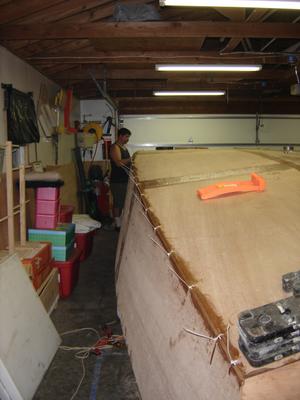
Weve finally had an opportunity to get back to work on the boat. The weather was cool, our schedules were clear, so we worked. Last night we spent about three hours tying the hull and filling the gaps with thickened epoxy.
Read More..

Selasa, 07 Juni 2016

I Havent Forgotten About You or the Boat

We didnt do any boat work this weekend. Greg was out of town. Were probably not doing any boat work next week because its gonna be my bachelor party. We wont be doing any boat work the weekend after becaust Im getting married that weekend, and its Greg and his daughters birthdays. Are you seeing a trend here? I miss working on the boat.

But last weekend, we joined the bottom hull pieces together with thickened epoxy. Not much progress, but every little bit counts.
Read More..

Kamis, 19 Mei 2016

and Then I Went to Help Greg


Front Transom Epoxy Gap
Originally uploaded by OzzyC.
... work on his boat.

This week we did a final laying of thickened epoxy, in preparation for taping the seams.

In this photo, you will see a small gap between the transom and the hull, and a screw hole.
Read More..

Kamis, 28 April 2016

hearts beads

Youre familiar already about my ? for Antonio Marras... 
and he loves hearts. 
Just like I do. 

Needless to say that when I saw on Yoox.com the light merino wool knit with tiny stuffed hearts I couldnt resist making my own summer version.


image on the left from Yoox.com

I had everything in my stash (because my stash is HUMONGOUS)
- grey grosgrain ribbon
- grey faceted (plastic) beads
- pearls beads
- some heart charms
- gray & white t-shirt scraps
- stuffing
- swarovski sew on crystals
- two D rings and chain
- one eyelet
- strong thread & needle
- safety pins (so I can take it on ad off and wash my shirt without going nut)


--> HOW TO:

- thread 5 strands in different lengths with the beads and the pearls, changing pattern in each strand
- attach all the 5 strands and the chain to one of the D ring
- attach only one strand and the chain to the other D ring
- punch the eyelet on one side of a 18" long grosgrain and fray-check both sides
- attach the other strands (while tangling them a little) to the eyelet
- sew about 25" of grosgrain ribbon on the flat part of both D rings
- fold the 18" piece of grosgrain leaving one part about 2" longer
- sew the folded part of the grosgrain at about 3" from the D ring (pin first and try on your shirt to make sure it fits as desired)


To make the hearts, cut the hearts in three different sizes:
2 medium grey - 2" wide x 1-1/4" tall
2 light grey - 1-1/2" wide x 1" tall
1 white - 1-1/2" wide x 2" tall
and follow my tutorial here for the sewing and stuffing
I sewed on the swarovski crystals on the light grey hearts, and sewed all the hearts on the strands as they were charms.

Pin both sides on the shoulder seams of the shirt and tie a bow in the back and the trick is done!

Best part... I can take it off and use it on a sweater for the fall... this is my take on 
"transitional refashion"!

xox, d.
Read More..

Sabtu, 16 April 2016

Patched Front Transom Gap


Patched Front Transom Gap
Originally uploaded by OzzyC.
We went around the entire boat and patched all gaps, holes, gouges, and so forth, with thickened epoxy.
Read More..

Senin, 07 Maret 2016

I Really Need a Picture

We havent done any pictures since January, and havent done any videos since... well, its been a little longer. The reason we havent done any pictures or videos is because things havent significantly changed in months. At least it doesnt seem that way to me.

Weve still been working on the hull... sanding and fairing, filling in the inevitable pinholes and sanding, and repeating as necessary. Weve added a couple more coats of tinted epoxy, and weve blended and shaped the spray rails to Gregs satisfaction. Weve been in sanding and fairing hell for over a year now. We started fairing in February 2006. By July, I was beginning to see the Law of Diminishing Returns kicking in. Id say that by August of 2006, we were firmly in sanding and fairing hell.

Greg and I have discussed this in depth on several occasions. Greg is a perfectionist by nature. He wants things exactly right before we paint. Im firmly convinced that the primer and paint will cover many of the imperfections we see now. I think that Greg is starting to come around to my way of thinking. But as I say this, I also acknowledge that some flaws weve corrected would not have been corrected by simply slapping a layer of paint on the hull. In the end, this is Gregs project, and Im his assistant.

Greg has said that if he had things to do over again, he would not have built up the perfectly sharp chines. He doesnt think that the performance payoff will outweigh the amount of work weve put in as a direct result of the chines. I tend to agree. So if youre thinking about building a boat, skip the sharp chines.

Part of the issue is that Greg and I are both family men. We have pretty busy schedules, so we can only get a couple of hours per week to work on the boat. This naturally extends the project by an order of magnitude. When I get frustrated, I try to keep this all in perspective.

With all of that said, I went back today and looked at our pictures from January. It doesnt look a lot different, but there is a noticeable improvement in the hull. The tinted primer helps smooth things out. The spray rails are shaped and blended. Yeah, I really need to take a picture.

Id also like to say hello to the newest member of my blog roll, Bruce Dillahunty at Craft-a-Craft.
Read More..
 
Boat Plans Book - Powered By Blogger