 Greg and I havent forgotten about you, this blog, or our project. Its just that we havent recently hit any milestones worth blogging about. As I mentioned in some of my recent postings, the part were on now is very long and tedious... not much worthy of a blog entry. Despite my lack of posting though, we have made significant progress, and its very close to the rate that I expected. This is largely due to Gregs work.
My family and I went to California for vacation recently, which prevented me from assisting Greg for two weeks straight. In all honesty, I suspected that very little would be done during my absence. (This is partially because much of what weve done to date is highly expedited by having two people working, and partially because I realize that I help keep Greg motivated.) But when I got back home, I was pleasantly surprised to find that Greg had made significant progress during my absence. While I was gone, Greg enlisted the assistance of our mutual friend Dan. Dan, thanks for your help while I was gone. I appreciate it, and I know Greg appreciates it.
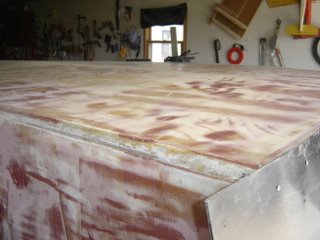
As you can see in the first photo, Greg and Dan made great progress in filling the bottom of the boat. Its very close to being finished.
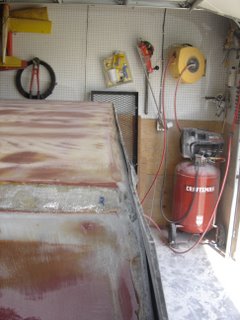 Greg also made a lot of progress in rebuilding the hard edges of the boat. Remember, this boat is designed to have a planing hull, so a perfectly flat bottom and very hard chines are essential in order to have this boat perform as expected at planing speeds.
In the picture to the right, you will see how we made the chines with relatively little work. Greg screwed thick sheets of plastic to the hull, as shown in this picture. This gave us (when I say "us," Im including Dan, because he was part of this particular process; he also provided us with the plastic.) a fairly straight, and very sturdy platform with which to work. We wedged epoxy thickened with wood flour and fiberglass particles into the space between the plasic, going slightly higher than the bottom of the hull. This way, we were sanding down, instead of requiring a second fill coat.
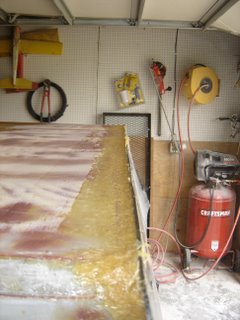 In this picture, you will notice the applied thickened epoxy. After the epoxy dries, we remove the sheets of plastic, and voila, a sturdy chine, ready for sanding.
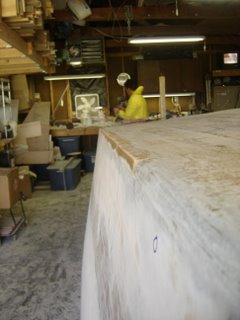 This shot will give you a basic picture of what the chines look like after the epoxy sets and the plastic is removed. What youre looking at is the starboard side. You will notice that the chines are not built up throughout the whole starboard side. This is because of the limited plastic available. It will require a second session to finish the side. You will also notice that we (again, "we" includes Dan) have been sanding and fairing along the entire bottom of the hull.
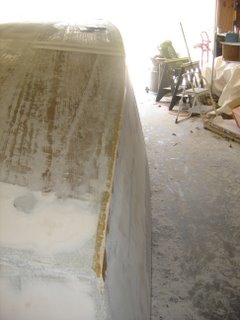 This final picture is taken from the bow, starboard corner. You will notice that Greg has also filled the front transom area, and the front bottom area, to compensate for the three-to-six layers of fiberglass. You will also notice the fair amount of fairing done on the bottom, and the hard chine. Like Ive said, its not that we havent been working, and its not that weve forgotten about you. Its mainly that were at a relatively tedious section of the project, and theres not a lot to report. After all, how many times can I say "Yep, were still sanding" and keep you all interested?
Until next time...
Oh yeah, you may have noticed that the boat has several different colors of filler. This is because Greg is utilizing a combination of whats cheapest and what works best for sanding and fairing in a given area of the boat.


 Thats not exactly true, but it feels good so say it and mean it... at least in this context. Yes folks, Greg finally said "good enough" and decided it was time to paint. In a desire to support this decision (and get a coat of paint on the boat before he changed his mind), we did a rare Saturday session. Between the final round of sanding (a quick but thorough sanding of both transoms and sides with 220-grit sandpaper), prepping the surface, mixing the paint, and the roll and tip process, we put in roughly four hours.

