The fairing and sanding continues. Greg read about a really neat idea that will likely save us countless hours of eyeballing, and in the end, provide us with a significantly more accurate finished product...
In my last entry, you saw the level that showed approximately how much filling we need to do. Well, Greg decided to wrap that level in plastic, run a strip of filler under where the level was, and then essentially mash the level into the filler and let things dry. After the filler dried, he removed the level, shaved down the excess epoxy and voila, he had a "rail" that gave us a guide for how much filler we need to use. By running a second "rail" down the center, and a third one down the other side, we had a rail system built, which will allow us to roll out a single, thick, accurate layer of filler and dramatically reduce the amount of sanding and fairing we will need to do. A stroke of genius!
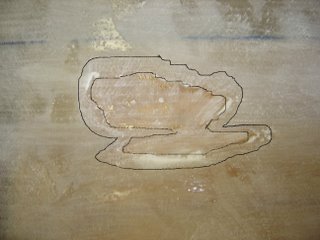 On the downside, when sanding yesterday, we came across a big spot that was starved for epoxy, as shown (and outlined) in the picture to the right. This is an area thats come back to haunt us from way-back-when. The area is approximately 4"X3." Its nothing that cant be overcome, but is a little frustrating.
We have yet to decide how to address the issue, but Greg has two ideas... one is to use fiberglass filler and epoxy, the other is to use glass micro-filler and epoxy. Ive found one or two other spots like this, but theyre small, in non-structural areas, and easy to fix.
 Heres another small stroke of genius Greg ran across...
-Are you tired of constantly stirring epoxy and/or thickener?
-Are you working by yourself and would like to save a little time?
-Are you working with fast hardener, and tired of worrying if its going to kick too quickly?
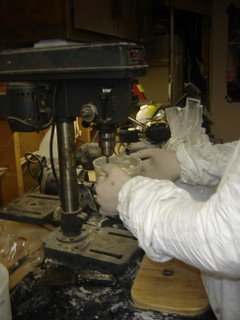
If any of these problems apply to you, then you should try what Gregs doing in this picture to the right. Use a drill (or drill press) and a paint-stirring bit to do the work for you. Its quicker and easier. Just remember to take measures to protect your drill. It would really suck if you ended ruining your drill because it got all gummed up with epoxy.
Read More..
In my last entry, you saw the level that showed approximately how much filling we need to do. Well, Greg decided to wrap that level in plastic, run a strip of filler under where the level was, and then essentially mash the level into the filler and let things dry. After the filler dried, he removed the level, shaved down the excess epoxy and voila, he had a "rail" that gave us a guide for how much filler we need to use. By running a second "rail" down the center, and a third one down the other side, we had a rail system built, which will allow us to roll out a single, thick, accurate layer of filler and dramatically reduce the amount of sanding and fairing we will need to do. A stroke of genius!
 On the downside, when sanding yesterday, we came across a big spot that was starved for epoxy, as shown (and outlined) in the picture to the right. This is an area thats come back to haunt us from way-back-when. The area is approximately 4"X3." Its nothing that cant be overcome, but is a little frustrating.
We have yet to decide how to address the issue, but Greg has two ideas... one is to use fiberglass filler and epoxy, the other is to use glass micro-filler and epoxy. Ive found one or two other spots like this, but theyre small, in non-structural areas, and easy to fix.
 Heres another small stroke of genius Greg ran across...
-Are you tired of constantly stirring epoxy and/or thickener?
-Are you working by yourself and would like to save a little time?
-Are you working with fast hardener, and tired of worrying if its going to kick too quickly?
If any of these problems apply to you, then you should try what Gregs doing in this picture to the right. Use a drill (or drill press) and a paint-stirring bit to do the work for you. Its quicker and easier. Just remember to take measures to protect your drill. It would really suck if you ended ruining your drill because it got all gummed up with epoxy.
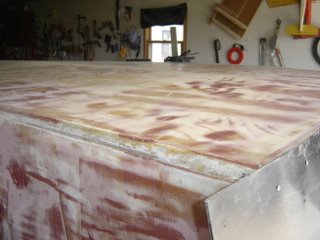 Greg and I havent forgotten about you, this blog, or our project. Its just that we havent recently hit any milestones worth blogging about. As I mentioned in some of my recent postings, the part were on now is very long and tedious... not much worthy of a blog entry. Despite my lack of posting though, we have made significant progress, and its very close to the rate that I expected. This is largely due to Gregs work.
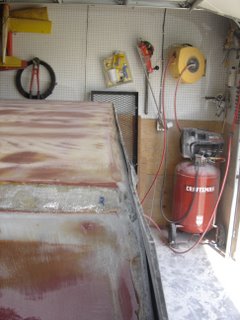 Greg also made a lot of progress in rebuilding the hard edges of the boat. Remember, this boat is designed to have a planing hull, so a perfectly flat bottom and very hard chines are essential in order to have this boat perform as expected at planing speeds.
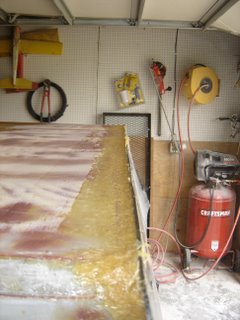 In this picture, you will notice the applied thickened epoxy. After the epoxy dries, we remove the sheets of plastic, and voila, a sturdy chine, ready for sanding.
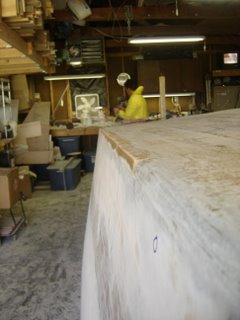 This shot will give you a basic picture of what the chines look like after the epoxy sets and the plastic is removed. What youre looking at is the starboard side. You will notice that the chines are not built up throughout the whole starboard side. This is because of the limited plastic available. It will require a second session to finish the side. You will also notice that we (again, "we" includes Dan) have been sanding and fairing along the entire bottom of the hull.
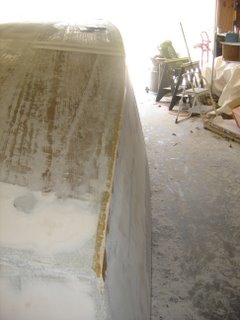 This final picture is taken from the bow, starboard corner. You will notice that Greg has also filled the front transom area, and the front bottom area, to compensate for the three-to-six layers of fiberglass. You will also notice the fair amount of fairing done on the bottom, and the hard chine. Like Ive said, its not that we havent been working, and its not that weve forgotten about you. Its mainly that were at a relatively tedious section of the project, and theres not a lot to report. After all, how many times can I say "Yep, were still sanding" and keep you all interested?

